
The Most Important Things To Understand About Creating and Editing PhotoTangler Collages (Desktop Version)
For casual photo collages, just dragging and dropping images into PhotoTangler will often produce great results. However, for better control of your project, understanding how scene elements work will unlock a lot of capabilities and control. For our purposes, a "scene" just describes the current layout of photos on the project canvas.Let's start by taking a deeper look at a simple blended collage project in PhotoTangler...
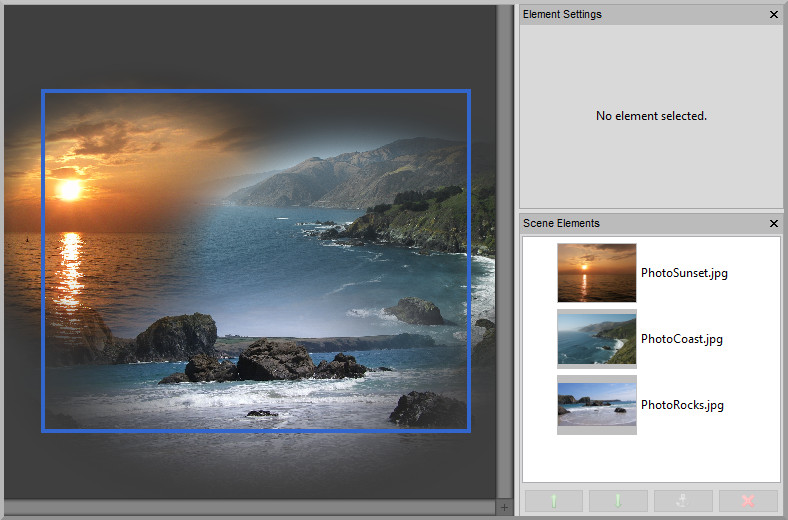
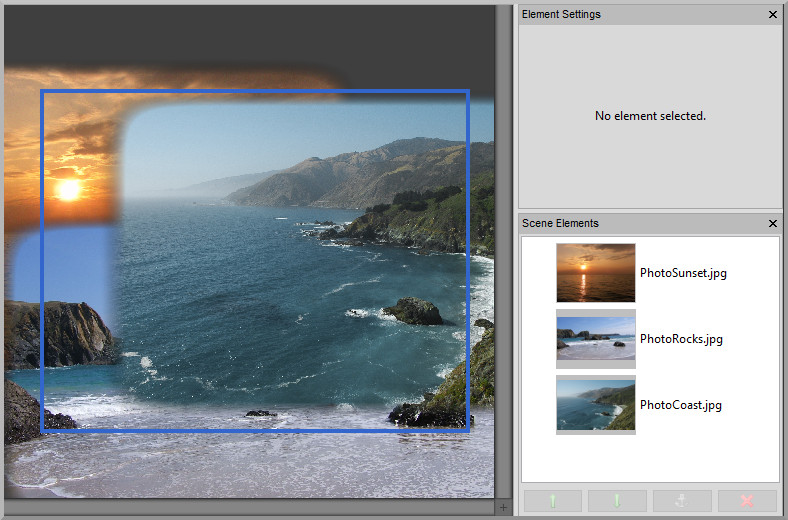
In the screenshot above, the scene is composed of 3 separate photos that were added. On the right side of the image, you'll see the "Scene Elements" window, which lists each individual photo in the project.
Using The Primary Editing Features
The simplest operation to understand is SELECTION. Selecting an image element can be done by clicking the actual image on the main project canvas, OR by clicking it in the "Scene Elements" list on the right. When you have a "cluttered" project with a lot of photos, it's often much easier to select the individual item you'd like to work with by using the list rather than the canvas.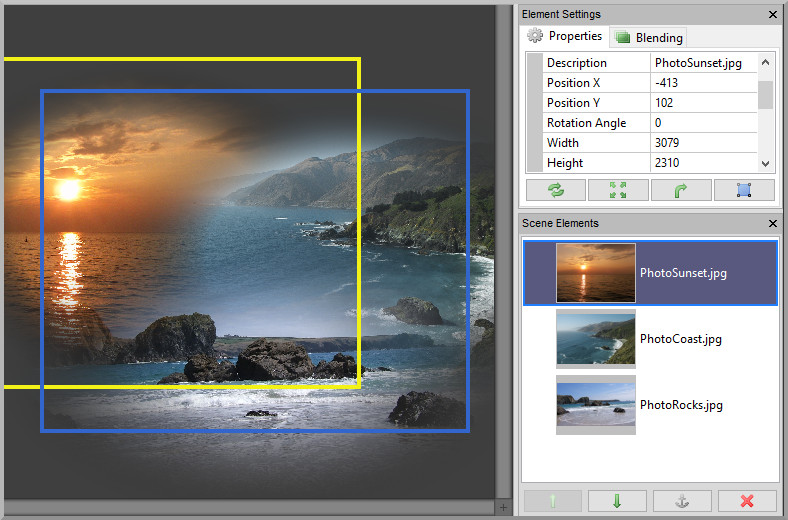
When an element is selected, you'll see a yellow highlight rectangle around its boundaries on the main canvas. You'll also see it highlighted in the "Scene Elements" list. In the top right "Element Settings" window, you should see a range of properties for fine-tuning the settings for that particular image element.
When an image element is selected, you can MOVE it around the canvas by simply clicking and dragging (with the mouse) on the canvas. You can ROTATE the image by holding SHIFT while clicking and dragging. You can RESIZE (or SCALE) the image by hovering over the yellow borders (they will light up), then clicking and dragging them. And you can do quick edits of the default BLENDING factor by scrolling the mouse wheel over a selected image. To fine-tune or reset the blending, click over to the "Blending" tab in the "Element Settings" window pane.
Those are the primary operations used to visually edit a scene. But there's more to know in terms of managing a project and its elements. For starters, you can right-click an individual element, either on the canvas, or on the "Scene Elements", and you'll see a pop-up menu with some additional options...
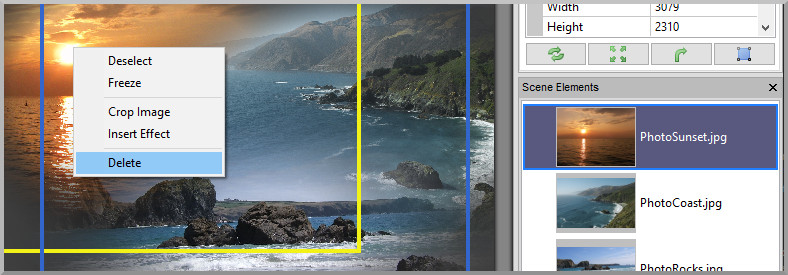
To remove an element from your scene, simply click the DELETE option.
Next we'll look at the first two operations in that menu. Image cropping and effects will be discussed in separate articles.
The first option, to DESELECT does exactly what it says. The "yellow" rectangle will go away, and the current selection will be unset. However, the FREEZE option requires a bit more explanation...
Earlier in this article, we discussed how a "cluttered" project can make it a little confusing in terms of selecting the specific image elements that you'd like to work with. The FREEZE feature is designed to help with this. When you freeze an element, it remains visible and active within the scene, but you can no longer select it by clicking it on the main canvas. For example, if you wanted to start your project with a large background image, freezing it immediately will ensure that you never accidentally click it while working with additional images placed on top of it.
To select a frozen image, you simply use the "Scene Elements" list rather than the main canvas. And you can right-click the item in the list to "Thaw" it, allowing it to be selectable again on the main canvas. In general, as you finalize the placement of specific image elements in your project, you will likely find that freezing them makes editing the rest of your project much easier!
How Element Ordering Works and Why That's Important
Now that we've covered all of the basic editing operations, we'll wrap up by taking a look at the impact of element ordering and how it all works. Don't worry, it's important, but very simple!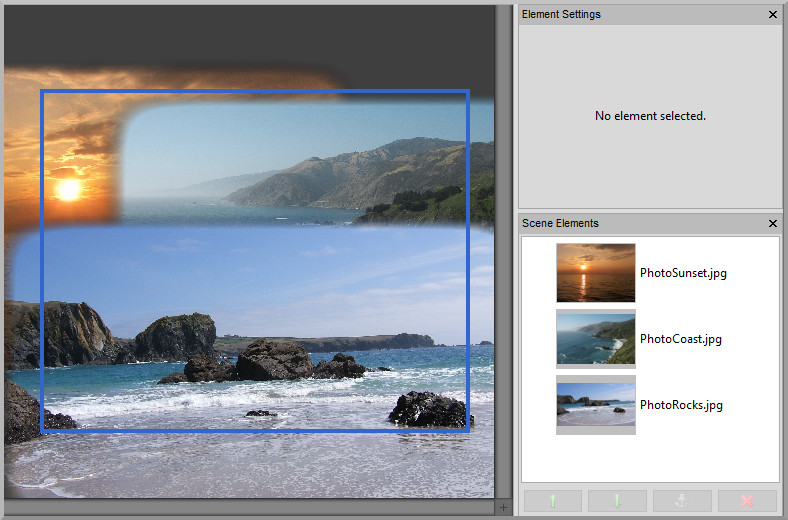
In the project above, the blending has been altered to more clearly reveal the boundaries of each image. Notice how they're "stacked" on top of each other in the order that they're listed in the "Scene Elements" list on the right. That is, they draw from "back to front", starting with the first item in the list. Because of the way image blending works in PhotoTangler, simply changing the order of the images will change the overall look of the project.
To CHANGE THE ORDER of image elements, you can click and drag an element in the "Scene Elements" list to rearrange its position within the list. Moving an element closer to the top of the list pushes it further "BACK" in the visible scene, while moving it lower in the list effectively pulls it "FORWARD." Alternatively, you can use the "Up" and "Down" icon buttons at the bottom of the list to move an element back and forward.
Another way to control the element order is by DOUBLE-CLICKING an image on the main canvas. Doing so will pull the image to the "front" of the scene (ie, move it to the bottom of the "Scene Elements" list.) While editing a project, this is likely the most convenient way to quickly change the order of images to see which arrangement works best.
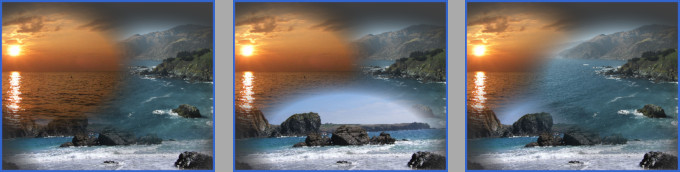
Double-clicking the "middle" image in the photo above will change the draw order to this:
Below are some examples of the exact same scene from above just with different ordering. At a glance, the differences might seem subtle, but for most projects, understanding and properly manipulating the order of your project elements can make a huge difference in terms of achieving the exact results you'd like.
Phew! That was a lot to consider all at once, but once you've mastered these fundamental concepts, you should be well on your way to making truly stunning photo collages with PhotoTangler!
For more articles visit here. For troubleshooting support, visit the support page.